Showing posts with label Hi-Float. Show all posts

Thursday, July 8, 2021

Top Tips when working with Helium-Filled Latex Balloons

Whether they are featured in an arrangement or tied to a single strand of ribbon, few things inspire more joy than a helium-filled latex balloon! To give your customers the most value, here are four essential tips on keeping your balloons—and profits—afloat.


1. Storage

The first step to ensure long float times for latex balloons is proper storage. Qualatex® latex balloons are 100% biodegradable, and so temperature and light have a major effect on the quality of latex balloons. Because of this it’s important to protect them from the elements until they need to be inflated. 

Many balloon stores use storage jars to contain and display latex balloons. 
 If using clear jars ensure that they are kept out of direct sunlight.


Avoid exposing your balloons to extreme heat and cold. Storing your uninflated balloons at moderate temperatures will maximise their lifespan. If stored properly, an uninflated latex balloon has a shelf life of approximately one year. Light also contributes to the degradation of latex balloons. Store your uninflated balloons in airtight, opaque containers for optimal protection. Not only does this protect your balloons against light, it allows you to clearly label and organise your product.

Sunlight will also cause your balloons to quickly lose their shine, so be sure to work away from windows when inflating latex balloons. Both heat and light contribute to the process of oxidation, which creates a cloudy appearance on the outside of latex balloons. While this is a natural step in the process of a balloon’s biodegradation, the effects of oxidation can be minimised by covering balloons with a plastic bag, especially if they will be exposed for a long period of time or if decor is done in advance. 


Latex balloons can also be protected with Balloon Shine™or Hi-Shine when they are applied to the exterior of an inflated balloon. Both of these products help prevent oxidation and add long-lasting sparkle to your decor. Balloon Shine is applied with a glove and wiped over the surface of the balloon, whereas Hi-Shine is applied using a spray. 


2. Inflate and Regulate

By inflating latex balloons correctly, you will maximise float times and provide customers with a more aesthetically pleasing product. When inflating a round latex balloon. It is important to fill it until a teardrop shape is achieved.
•Overinflating balloons adds stress and opens the pores of the latex so helium escapes faster. •Underinflating balloons reduces their float time because there is less helium to lift the balloon’s weight.
•The use of a sizing template, such as the Qualatex ProSizer Templates, is helpful for inflating balloons fully and uniformly. 


3. Be Wary of Weather

Proper storage and inflation are only half the battle. A standard 11" Qualatex latex balloo inflated with helium floats between 18 to 24 hours. However, even properly inflated balloons can have different flying times depending on weather and altitude. Heat causes helium to expand, and cold causes it to contract. Expect balloons to expand when moved from an air-conditioned room into a warmer environment. Likewise, helium-filled balloons may appear half-full and not float when moved into much cooler temperatures. When moving balloons from a cool environment to a warmer one, a general rule is to slightly underinflate the balloons. After moving them to warmer conditions, balloons will typically expand back to their ideal size. Air becomes lighter as elevation increases, so the amount of lift you can expect from helium-filled balloons will be reduced. Because of this, larger balloons are recommended when inflating for higher elevations. Conduct your own tests in different circumstances and altitudes to determine typical float times. 

4. Maximise Floating Time


So what is HI-FLOAT?
HI-FLOAT® balloon treatment is a solution of a plastic material dissolved in water. It forms a coating inside latex balloons that greatly reduces the helium or air loss. 

With ULTRA HI-FLOAT, latex balloons can be prepared a day ahead of time, and balloon bouquets will float for several days.
Helium-filled latex balloons float 25 times longer on average with ULTRA HI-FLOAT, and air-filled latex balloons maintain full size for over one month with ULTRA HI-FLOAT.
HI-FLOAT is very safe. It is non-toxic, non-irritating, noncorrosive, nonflammable and biodegradable. It is similar to the glue on the back of postage stamps.

Average Floating times with and without HI-FLOAT

Float Times                      Helium Only                 Helium and Hi-FLOAT
11” / 28 cm latex                    1 Day                                 1- 4 weeks
16” / 41 cm latex                    1 ½ Days                         3 - 7 weeks
36” / 90 cm latex                    3 - 5 Days                         6 - 20 weeks

It's easy to see why a professional decorator would use HI-Float in all their helium-filled latex balloons!


Follow these balloon care tips, and you will greatly increase the performance of your Qualatex balloons as well as your customers satisfaction!


Happy Ballooning! 

Sue
Follow me @suebowler


Friday, March 23, 2018

How to make a Confetti-Filled Deco Bubble with Ultra Hi-Float - Step-by-Step Video


Confetti Deco Bubble Balloons


Everyone loves confetti-filled balloons, and that includes the fabulous Qualatex® Deco Bubbles, too! I know that many of you are using the static method to stick your confetti to the inside of the Bubble, however, as we also know, this does not always work. Or the static drops out of the Bubble when moved to a new environment. Here is a surefire way to make sure that the confetti stick and stay in position.

Check out the instructions below and then watch the video clip for a demonstration on how to do this technique. 


INGREDIENTS
• ULTRA HI-FLOAT®
• 20
" or 24" Deco Bubble
• Mylar or foil confetti
• A kitchen/canning funnel

20" Deco Confetti Balloon

1) Add a ½ squirt of ultra HIFLOAT with purple clip on pump.
2) Rub the outside of the Deco Bubble to spread the coating over the inside surface.
3) Blow a puff of air into the Bubble so the sides of the balloon are not touching.
4) Add about a ¼ cup of chopped mylar confetti.
5) Inflate the Bubble with helium to about the size of a soccer ball.
6) Shake the Bubble vigorously to spread the confetti uniformly inside.
7) Fully inflate the Bubble with helium and tie.

24" Deco Confetti Balloon

1) Add 1 squirt ultra HIFLOAT with purple clip on pump.
2) Rub the outside of the Deco Bubble to spread the coating over the inside surface.
3) Blow a puff of air into the Bubble so the sides of the balloon are not touching.
4) Add about a ½ cup of chopped mylar confetti.
5) Inflate the Bubble with helium to about the size of a soccer ball.
6) Shake the Bubble vigorously to spread the confetti uniformly inside.
7) Fully inflate the Bubble with helium and tie.
Note: When inflating a Deco Bubble with confetti, safety glasses are recommended.


I hope that this helps some of you?

Happy Ballooning!

Sue
suebowler.com
Follow me on Instagram @suebowler
Sue Bowler www.suebowler.com


Monday, September 25, 2017

HI-FLOAT - the low-down on this magical sticky stuff!

It's truly amazing how the balloon industry has developed over the past thirty-five and more years! Who would have ever thought that there would be a liquid that would make our latex balloons float for up to twenty-five times longer! 


HI-FLOAT® is a product that we certainly take for granted and no professional balloon company could be without it. But I wonder how many of us know how its invention came about?


In 1982, Marjorie Burchette opened a small balloon delivery shop in Louisville, Kentucky, U.S.A. Within a short time, Marjorie became aware that her customers were disappointed that the latex balloons would only float for a day. She felt sure that her husband Don, a chemical engineer would be able to resolve this. Given this task, Don went to work on the problem working at night in his basement shop, and after about a year, he had developed HI-FLOAT. The rest, of course, is history; HI-FLOAT has become a phenomenal success and an essential tool for every balloon professional. 


HI-FLOAT has come a long way since that time. Andrea Burchette Cash, Phillip Cash, and Keith Burchette continue to run and grow the family business — Keith jokingly refers to working in a family business as the "Thanksgiving Dinner that never ends. It tends to be a struggle not to bring your work home with you. I encourage everyone that works with friends and family to do a little research on the subject to ensure that they succeed in their mission."  


Phillip and Andrea Burchette-Cash

Keith Burchette
In 1992, HI-FLOAT introduced an improved formula, SUPER HI-FLOAT, which worked twice as well. In 2002, the next generation of balloon treatment was born — ULTRA HI-FLOAT. This concentrated formula worked twice as well as SUPER HI-FLOAT, and it increased the floating life of a latex balloon by up to 25 times, on average.


So what is HI-FLOAT?

HI-FLOAT balloon treatment is a solution of a plastic material dissolved in water. It forms a coating inside latex balloons that greatly reduces the helium or air loss. 
With ULTRA HI-FLOAT, latex balloons can be prepared a day ahead of time, and balloon bouquets will float for several days.
Helium-filled latex balloons float 25 times longer on average with ULTRA HI-FLOAT, and air-filled latex balloons maintain full size for over one month with ULTRA HI-FLOAT.
HI-FLOAT is very safe. It is non-toxic, non-irritating, noncorrosive, nonflammable and biodegradable. It is similar to the glue on the back of postage stamps.


Average Floating times with and without HI-FLOAT


Float Times  Helium Only Helium and Hi-FLOAT
11” / 28 cm latex  1 Day 1-4 weeks
16” / 41 cm latex  1 ½ Days 3 - 7 weeks
36” / 90 cm latex  3 - 5 Days  6 -20 weeks

It's easy to see why a professional decorator would use HI-Float in all their helium-filled latex balloons!

But you can do so much more with Hi-Float! 


Confetti on the Inside of Clear Balloons — this is one of today's top trends, and can you believe HI-FLOAT showed us how to do this thirty years ago!


It is easy to make festive, eye-catching arrangements by putting confetti inside HI-FLOAT treated balloons. Confetti balloons can be used to create elegant decor for special events such as New Year’s Eve.
The confetti needs to be made of soft foil. Sharp edges could cause the balloon to pop. When inflating a balloon with confetti, safety glasses are recommended.

Ingredients:
• ULTRA HI-FLOAT
• 16-inch clear latex balloons
• Foil confetti
• A canning funnel

Instructions:
  • Add ULTRA HI-FLOAT to a 16-inch clear balloon using the grey pump restriction clip.
  • Rub the outside of the balloon in the usual manner to spread the coating over the inside surface.
  • Blow a puff of air into the balloon so the sides of the balloon are not touching.
  • Add about 1/3 cup of chopped foil or other soft confetti into the balloon through a funnel. You can make confetti by cutting up some old foil balloons that have popped, or you can buy it pre-chopped.
  • Inflate the balloon with helium to about the size of a grapefruit.
  • Shake the balloon vigorously to spread the confetti uniformly inside.
  • Inflate the balloon the rest of the way with helium, and tie it with ribbon.
  • This same technique can be used to put sparkling glitter inside the balloon.
Tip: The key to getting the confetti uniformly spread over the inside of the balloon without forming clumps is to avoid rubbing the balloon after the confetti is added. Instead, inflate the balloon slightly and shake it.
Note: It is always a good idea when working with confetti to wear protective eyewear.


How about making magical Spider's Web balloons for Halloween!

For a unique Halloween decoration, use HI-FLOAT and clear balloons to make balloons with spider's webs inside. 

Ingredients:
  • ULTRA HI-FLOAT
  • 11-inch clear latex balloons
  • A small rubber spider
Instructions:
  • Treat a clear balloon with HI-FLOAT. Refer to the clip guide to choose the correct restriction clip based on balloon size.
  • Rub the balloon to spread the HI-FLOAT.
  • Inflate the balloon with air to about 75% capacity.
  • Seal the balloon with a plastic disc or clip.
  • Let the HI-FLOAT in the balloon dry overnight. Place the balloon out where there is good air circulation. It must be very dry in order for the spider  web to form.
  • The next day, remove the clip and deflate the balloon.
  • Insert a small rubber spider.
  • Hold the balloon by the stem and the top as shown below, and stretch it a few times to separate the dry film from the wall of the balloon.
  • Slowly inflate the balloon with helium or air.
  • As the balloon inflates, the HI-FLOAT film will continue to separate from the wall of the balloon in several places and hang to form a spider web. If you inflate the balloon too quickly, the HI-FLOAT coating will totally come off, and the special effect will not work. If the coating does not separate from the balloon as it inflates, deflate the balloon again and stretch it a couple more times. Use caution so the coating does not totally come off inside the balloon.
  • This takes a little practice, but once you’ve mastered the technique, almost every balloon turns out beautiful.
Note: Since the HI-FLOAT coating inside the balloon is no longer intact, the balloon will not have an extended floating life. A long-lasting product can be made by inflating the balloon with air instead of helium and putting it on a cup and stick. Use the dilute-coating technique on the outside to keep it from oxidizing.


You can even use HI-FLOAT to create Confetti-Filled Deco Bubbles. Here are the instructions on how to do it!

INGREDIENTS
• ULTRA HI-FLOAT
• 20" or 24" DECO BUBBLE
• Mylar confetti
• A canning funnel

20 INCH DECO CONFETTI BALLOON
1) Add a ½ squirt of Ultra HI-FLOAT with purple clip on pump.
2) Rub the outside of the Deco Bubble to spread the coating over the inside surface.
3) Blow a puff of air into the Bubble so the sides of the balloon are not touching.
4) Add about a ¼ cup chopped Mylar confetti.
5) Inflate the Bubble with helium to about the size of a soccer ball.
6) Shake the Bubble vigorously to spread the confetti uniformly inside.
7) Inflate the Bubble the rest of the way with helium and tie.

24 INCH DECO CONFETTI BALLOON
1) Add 1 squirt of Ultra HI-FLOAT with purple clip on pump.
2) Rub the outside of the Deco Bubble to spread the coating over the inside surface.
3) Blow a puff of air into the Bubble so the sides of the balloon are not touching.
4) Add about a ½ cup chopped Mylar confetti.
5) Inflate the Bubble with helium to about the size of a soccer ball.
6) Shake the Bubble vigorously to spread the confetti uniformly inside.
7) Inflate the Bubble the rest of the way with helium and tie.


You can also do the same process when creating air-filled Deco Bubbles! These look fantastic as centrepiece toppers, and because the balloons are air-filled you can use a little more HI-FLOAT and a lot more confetti! 

Design by Sue Bowler, CBA.
Photograph by Cam Woody, CBA.

Note: When inflating a Deco Bubble with confetti, safety glasses are recommended.


As you can see, there are some great design idea tips working with HI-FLOAT. To see even more ideas, click HERE, or visit the HI-FLOAT YouTube Channel.

A huge thank you to Marjorie Burchette for having the initial thought to extend the floating time of the latex balloon, and to Don Burchette who made it happen!

Happy ballooning!

Sue
www.suebowler.com


Friday, February 24, 2017

Glitter Balloons!

Last month when I created a design for one of the Spring Fair window displays, I decided to make glitter balloons to complement the new, beautiful — in fact, probably one of my favourite ever Qualatex® birthday Microfoil® balloons — 18" "Birthday Pink & Gold Dots," Who cannot love this balloon!


#49164 18" "Birthday Pink & Gold Dots."
Design by Sue Bowler CBA
Here is the design that I created to show off this fabulous new balloon. I decided to have a go at creating a design using the organic style, which is so very popular at the moment. It was so much fun adding in the balloons, but it's important not to go too wild and still consider elements and principles of design, especially proportion, line, colour, and visual balance.

Friday, August 19, 2016

Balloon Basics - Inflating and Tying Latex Balloons

For many of you that regularly read the Very Best Balloon Blog, you probably already know all the basic techniques that we use. However, there are many that are new to the wonderful world of balloons, others that are self-taught, and those who might like a quick refresher! 

I would like to start by saying that there are no right or wrong techniques, just those that might be a little easier or have benefits when working with multiple balloons. I know that I tie balloons a little differently from some of my ballooning friends, but like many, I was self-taught and don't feel the need to change my technique as it works really well for me.

Latex Inflation

When inflating Qualatex® round latex balloons, it is important to fill them until the balloon forms a teardrop shape. An over-inflated round balloon develops a pear shape, whilst under-inflated balloons are more round in shape.


This rule does not apply to the giant latex 30" to 36" balloons, which are produced on different forms* and should be round rather than teardrop-shaped.

Latex balloons may be filled with air, helium*, or balloon gas.* Balloons that are 9" or smaller are generally filled with air rather than balloon gas or helium as they have a very limited floating time, which is generally not suitable for decor.

Balloons filled with air do not float and stay inflated considerably longer (weeks rather than hours) than those inflated with balloon gas or helium.

Balloons inflated with balloon gas or helium are affected by extremes in temperature and altitude. Helium expands in the heat and contracts in the cold. On hot days, when moving balloons from a cool environment to a warm or hot one, ensure that you slightly underinflate your balloons to allow for expansion. It is better to pre-inflate your balloons to their full size first using air, and then re-inflate to a smaller size with helium. For example, an 11" balloon can be pre-inflated to 11", deflated, and then re-inflated to 10.75" or 10.5". By not pre-inflating your balloons you may find that they will still pop even when underinflated.
On a cool day, slightly overinflate the balloons when moving from a warm environment to a cooler one.  In normal conditions, balloons inflated with balloon gas or helium should be inflated to their correct size to ensure maximum float time.
Personally, I would do some floating tests or trials when working in different temperatures to ensure that the balloons offer maximum float time in different conditions.

I recently wrote a blog, Balloons and the Great Outdoors, that may help you when working with balloons in different weather conditions.

Sizing Balloons
Sizing balloons is important for two reasons:


Very Best Balloon Sizer
Available at European Qualatex Distributors.
  • Ensuring that all your balloons are inflated to the same size when creating decor will offer a professional finish.
  • Balloons filled with balloon gas or helium will have the maximum floating time when inflated to the correct size.
You can use a sizing template to size a balloon. There are various options available to purchase, or you could make your own. 


Thursday, May 9, 2013

A sticky situation...which glue is best for you and your balloons? Updated October 2016


When it comes to sticking balloons and other materials, there are many different adhesives to choose from, but which is the best glue or adhesive tape for the job?

Latex to Latex
What could be more perfect than a rubber adhesive?  A latex-based glue! In the U.S, Elmer's® make a rubber cement that works perfectly — it dries fast and makes a strong bond. When I first wrote this post in 2013, it was not easy to find Elmer’s in Europe, but today it is readily available in a number of different stores.

Advice from Robbie Furman, CBA, when using rubber cement.

“So you are going to use rubber cement in your design?  Well, there is a lot to know about rubber cement before you get started.  
Always use acid-free and wrinkle free - The best that I have found is Elmer’s. It is the one in the orange jar.  
Letting your glue get thicker - I recommend when you first buy your rubber cement, you open up the jar and leave the lid/brush off for a day. This will thicken the rubber cement up, but it will not dry it out. Rubber cement is very liquid when you first buy it, and if you spill the jar, the rubber cement will come pouring out and making a big mess. Having it thicker will help to avoid these problems. (Keep the brush in a cup of water whilst doing this process so it doesn’t dry out.)

Static electricity - When you are using rubber cement, keep in mind that any dripping rubber cement will form into tiny thin strands. Often our balloons contain a little static electricity and this will attract the dripping rubber cement, and without you realising you start to get it all over your balloons. When you go to touch the balloon, you will leave thumb prints and make a big mess.  Keep your balloons far enough away from the jar to avoid this problem.  

Constant use of rubber cement - If you have to continuously use the rubber cement, the trick is to NOT put the brush back into the jar, but leave it sitting up on the table.  This will avoid the time it takes to keep wiping off the excess rubber cement. When you need to use the rubber cement again, just dip the brush a little into the bottle and this will save you time.

Gluing a small area - When you need to add a dab or a little bit of rubber cement to a balloon, the trick is not to swipe the brush over the area you need to glue, but swipe the balloon over the brush.  This will give you more control of how much glue goes onto the balloon and will give you more control of the area to be glued.
I hope that these tips help you in your work!" 

Balloonfully yours,
Robbie.


Another adhesive that works extremely well for securing latex to latex is 
Click-Click™ Balloon Bond®.
This is a two-sided adhesive that is perfect for connecting latex balloons and other materials to balloons.

In 2013 (when this post was first posted)  this tape was very new and its benefits had not been truly realised. However, today it is very much a tape that professionals keep in their tool boxes. 

Luc Bertrand, CBA, of Waw Balloons in Vichte, Belgium.
“I mainly use Balloon Bond for latex to latex balloons, but it works very well for securing foil/foil and latex/foil details. Balloon Bond may need some practice to use, but once mastered, it is a perfect glue for adding details and elegant as a bonus, as it is barely visible.”


For more information regarding Balloon Bond, check out my post Balloon Bond Saved the Day! http://theverybestballoonblog.blogspot.co.uk/2013/06/clik-clik-balloon-bond-saved-day-this.html#


Foil to Foil


"Stretchy Balloon Tape is my number one tape by far. I use it a lot! It is the only sure connection for foil balloons without putting any stress on them. When using stretchy tape I take one side of the backing tape off and reposition across in the middle, I then take away the other half of the backing tape. I then position the stretchy tape on the two foil balloons that I am connecting. The repositioned backing tape now shows the distance that will be taken between the two foil balloons. Now turn the balloons around, take away the backing tape and an additional piece of stretchy tape on top. This gives a result of two foil balloons with only a few millimetres between only using the double stretchy tape. The tape kind of ‘melts together.’ I find that this is the best way to make very strong connection points onto foil, Bubble, and latex balloons. The fact that it is stretchy or elastic makes it a stronger connection as it can shrink, grow, and move with the balloon construction. In short, 
Stretchy Balloon Tape is a must in my tool box.” Best regards Luc!


I agree with Luc that Stretchy Balloon Tape is an essential item in a professional’s tool box. A few days ago, I was preparing designs for a class that I was teaching and accidentally pierced an inflated Microfoil
® balloon that I was using in one of my designs with a sharp floral wire! Rather than discard the balloon and replace it with a new one, I placed a tiny piece of Stretchy Balloon Tape over the hole and then re-inflated the balloon—perfect repair and good as new! See picture for the repair, you will need to look at the close-up to see the tape!


Uglu Dashes and Strips (Oasis©)

For me, finding this product was a complete revolution. It is not a product that has been readily available in the U.K., however it is now available from many UK balloon and party wholesalers.  Speak to any balloon professional and they will all tell you that Uglu Dashes and Strips are the best. David Mahoney of Balloons Everyday, in Dallas, TX, U.S.A says, “They stick to almost everything, the dashes are clear so clients won't see the mechanics that much.  The fact that they are pre-cut it makes it simpler to use.”
Anne McGovern, CBA, of Elegant Balloons in Pearl River, NY, U.S.A.  “I prefer to use the Uglu Strips. Firstly, you can cut them to size and into thin strips, which is great for attaching foils.  I find they are even more sticky than the dashes, and never lose the stickiness. Working with the roll is horrible. I found it stuck to the scissor when I cut it, but this does not seem happen with the strips.  Another thing I found out while setting up at an event is that it is very hard to get any glue dots or Uglu to stick to Super Agate balloons! I make sure that I have rubber cement if I am working with Super Agate balloons.”
Tommy DeLorenzo, CBA, of Balloons by Tommy in Chicago, IL, U.S.A. “I like Uglu because it holds very well and is easy to use because it is already in little pieces. We use it to stick all sorts of balloons together as well as to connect Lomey poles to tiles. Balloon Bond is great when you need a larger surface stuck together, just be careful because in cool temperatures it doesn't hold as well.”


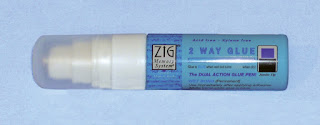
Glue Pens are great for personalising balloons. You use them like a regular marker to write names or messages and then sprinkle with glitter to give beautiful results!


Hi-Float®
I don't suppose many people consider Hi-Float to be an adhesive, but it certainly is! I use Hi-Float to coat latex balloons so that I can add glitter to the outside, or you can do the same internally to create some truly great effects!


The 5" Balloons in this design have been “glittered” using the Hi-Float method! I wrote a BLOG on how to make his design:

There are a few adhesives that I have not mentioned in this blog, so I will just touch on them now.


Glue Dots and Balloon Sticky Dots


Works well with latex, Microfoil and Bubble Balloons. Easy to use for quick adhesion of elements, such as this red nose on the Smile Face balloon.


Lomey® Adhesive is a glue that has been designed to securely bond Lomey Design System components such as dishes and poles. It is waterproof and dries clear. I have used it on other plastic dishes and it does work, but it takes a long time to dry. Once it dries, however it’s permanent. Once it's dries, however, it's permanent! I tried it on glass and it did not work.


Low temperature or Cool Melt Glue Guns
You would probably think that glue guns and balloons would not be a good combination, however, low temperature or cool melt glue guns work perfectly well when making designs. They are particularly effective when building  Mosaic Frames for Balloons and also when adding the balloons to the frames. 

Be aware,  even cool glue is very hot, and yes, it can pop a balloon, so you need to be very careful when working with one. The main problem with this type of glue is that it reacts with temperature; if it's cold, the glue sets very hard and brittle, and in the heat it can soften off.


Gorilla Glue™
Earlier this year, I had a job where I needed to secure Lomey poles to floor tiles. I needed to find an adhesive that would glue to two different surfaces and that would be strong. After a little research I found Gorilla Glue.
TOUGH, WATERPROOF, STICKS TO EVERYTHING
The product that started it all. Original Gorilla Glue built a name for itself with its incredible, industrial holding power and versatility. Water activated, it expands into materials to form an incredibly strong bond to virtually anything. As your solution for almost any project or repair, Gorilla Glue is 100% waterproof, weatherproof, you-name-it-proof. It's safe for indoor and outdoor use and strong enough to stand up to intense heat or cold. Sand it, paint it, stain it. Simply stated, it’s the Toughest Glue on Planet Earth.


Pan Glue was something that I only ever used to see in the U.S. It always looked very messy to me, but those who used it would say not! It's a glue that can be used on both latex and foil balloons. It's a strong glue that dries fast, easy to work with, and is not effected by atmospheric changes.
The downsides of pan glue is that it’s difficult to be specific on application, can weaken the seams on foil balloons, and does not dry clear.
Colin Stewart, CBA, of Alliston, ON, Canada has been using this type of glue for many years. In 1997, Colin and his team built these Christmas Bells and he still uses the same method today.


Let me know your favourite adhesive when working with balloons and why you like using it, and I will add it to the blog!

Happy ballooning!

Sue
Follow me on Instagram @suebowler